The first Rhino production aircraft has been fitted with a FTP camera. The video 'We're Going to Crash... Crash Testing the Rhino' was shot entirely using this system.
________

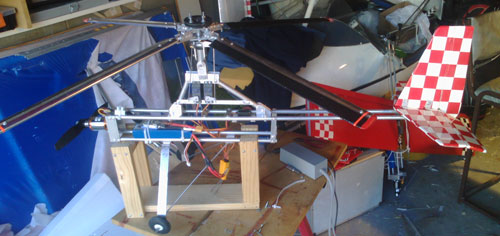
 By next week we hope to be flight testing our new autogyro. The idea is to be able to simply remove the wings from a Rhino and replace them with a rotatory wing. The head is fully articulated and the rigid aluminium blades are are pivoted to allow 'flapping'. On paper the aircraft should be stable and maneuverable, but like all prototypes, we won't know until we test fly it... hopefully next week.
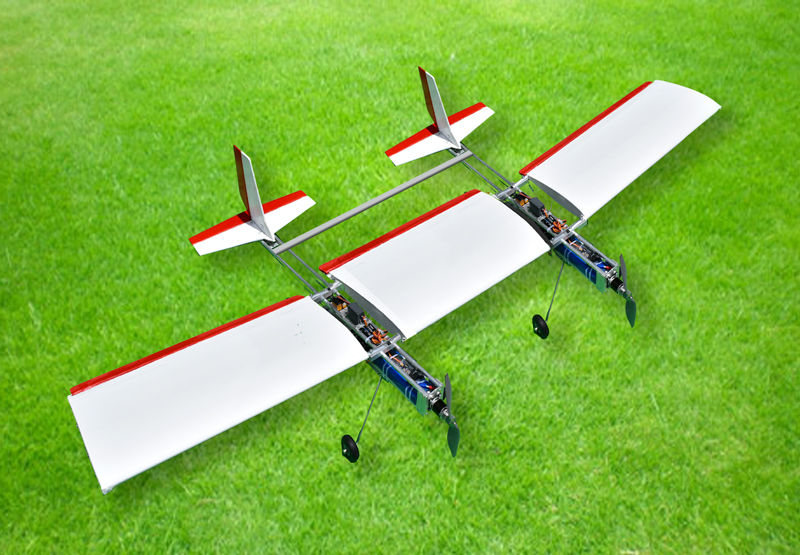
I’m excited about this aluminumRC aircraft and I’d like to share it so, eventually, I will share the plans and for those that don’t have time to build one, I am looking at manufacturing the complete radio controlled aircraft. First, I will need to build some templates and jigs. I will draw up the plans after I have built the jigs so that everything is compatible. Manufactured parts will fit home builts and so on. Along with the complete aircraft (less the battery), I will offer all of the replacement parts. Regarding parts another wonderful feature of the Rhino is that all parts can be swapped out. For example, if you have a particularly hard hit and bend the main fuselage spars, as I have done, it is simply a case of drilling out the rivets and fitting the new spars. But before I start offering the aircraft publicly, there is one more exciting idea that needs to be tested, an idea conceived over a beer with a mate of mine, Glen... A Twin Rhino, my next project is to build two Rhinos and ‘mate’ them. In addition to the two Rhinos I will build a centre wing section that incorporates flaps and an aluminium aero-foiled cross piece to support the tail. This will be quite a beast…
Next project - to 'mate' 2 Rhinos to create the Twin. Can't wait to fly this beast. :)
Twin Rhino ... The Beast
Also
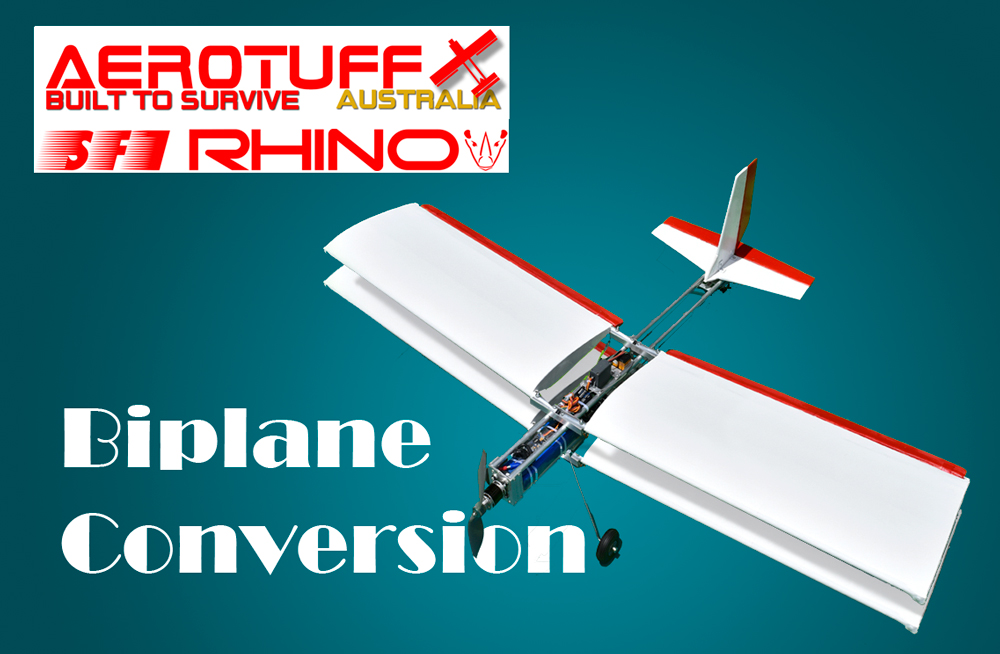
Working on a simple method to add a second set of wings... the bottom ailerons would become flaps.
The Rhino Biplane
Happy Test PilotAfter Flying the Rhino with no dihedral. Athol found it responsive and just as he likes an aircraft to handle. 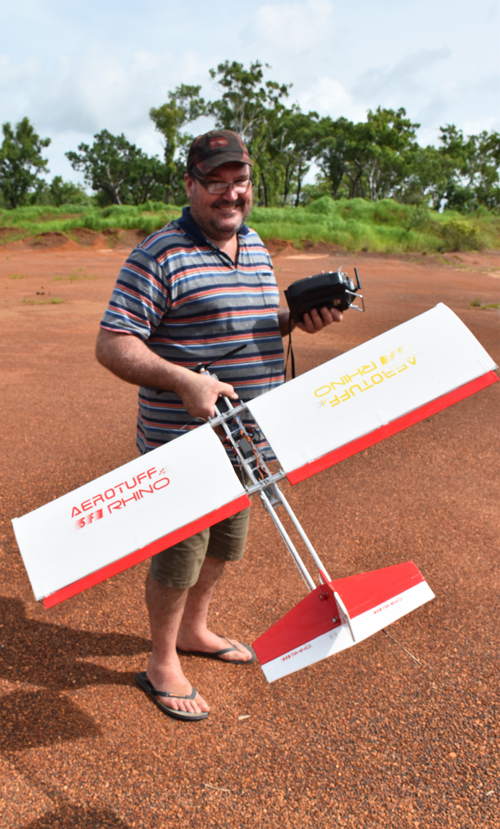
|
The SF1 Rhino weighs 2kg and has a wing loading of just under 70 g/sq.dm. This translates to a higher landing speed, in the range of sports aircraft, so the landings are all about flying it on and cutting the power as you flare. This makes the Rhino aluminium RC aircraft a great trainer for the sports category of aircraft. This is not something to shy away from. This rugged aircraft is ideal for perfecting your landings so you can progess to the trickier sports and scale aircraft.
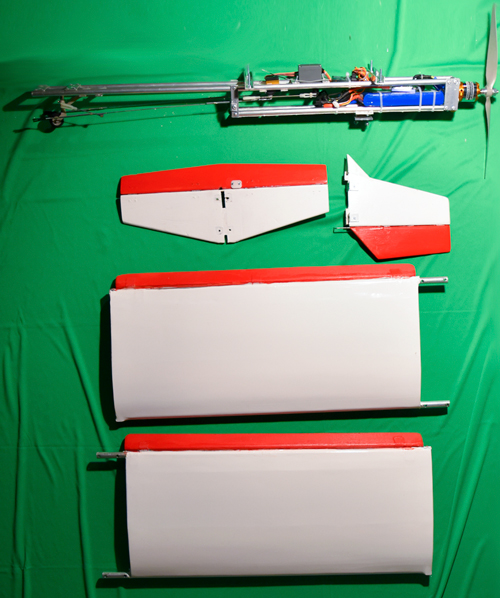
Two Rhinos Ready to TravelThe Rhinos turned out to be easy to disassemble and reassemble. 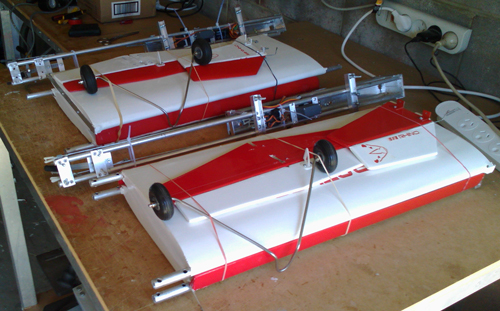
|
I finished the prototype in November (2016) and it was soon in the air (refer to’SF1 Rhino Prototype Takes to the Air’). It was then that my wife came up with a great idea, “Why don’t you build one for Athol (my brother) for Xmas?”. Fortunately, the build time for the Rhino is not excessive and a second one was ready before our departure.
Both aircraft received bigger motors as I felt that the prototype was a little under powered and I increased the depth of the second fuselage to better fit the battery and speed controller.The time came to travel and both aircraft arrived in Darwin unscathed. I was excited to watch Athol unwrap his present though the whole project was a bit of a risk. The prototype had only one flight and with different running gear. I had to trust my instincts. As it turned out, my instincts were on the money as both aircraft survived 2 weeks of punishing flight testing only being grounded for a short while through a shortage of props.
Taking a Hard HitI sent the prototype into the ground at high speed. It was the sort of impact where you expect to see a plane turned back into a kit. But not the Rhino. A quick trip to the hardware for some aluminium and she was flying the next day. 
|
We were rough on them; flying out of a gravel pit during the wet season has its downfalls. In my hands, the prototype suffered two nasty hits, one nose in stall from 20 feet that would have destroyed a lesser aircraft and numerous bad landing. It's interesting to note that the name for a group of Rhino's (the animals) is a 'Crash'.
One of the unique features of the Rhino is the ability to adjust the dihedral from 0 to 10 degrees. We flew both aircraft with full dihedral and Athol flew his with zero degrees. He declared that he much preferred the zero configuration, that is what he is used to and he felt it, ‘just handled better in general.’ We will do some more testing to compare the configurations.
Test FlyingThe prototype with the smaller motor. It flew well but the Turnigy D3542/5 1250KV gives this aircraft some real grunt. 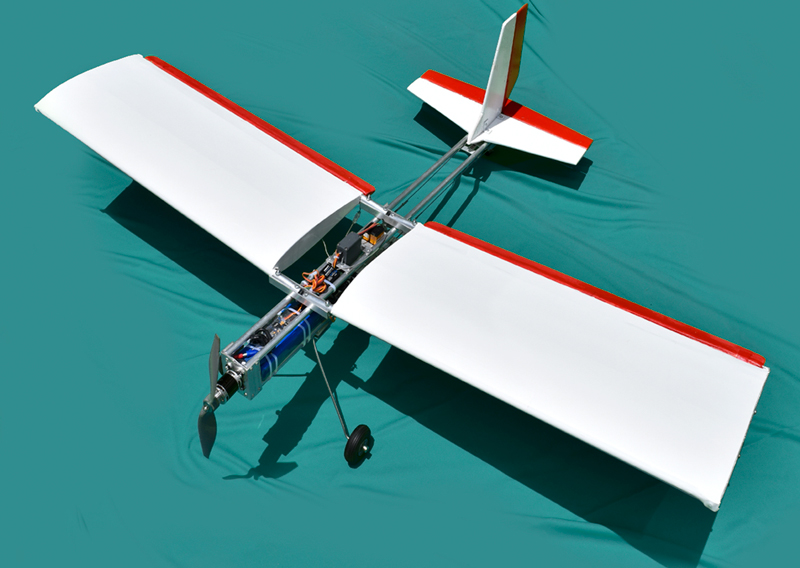
|
The concept of a 'Suitcase Flyer' came about prior to a planned vacation to see my brother, Athol and family in Darwin. He and I had been involved in RC flyingin the Eighties but due to work and family commitments... well, you know the story. About 15 years ago he went back to it and a couple of years ago he conspired with my wife to buy me a RC helicopter for Xmas. Well, I was hooked again. As an RC pilot I am both rusty and inexperienced however I have been around aircraft all my life, flight is my passion and I've always been an avid aviation scholar. I'm not really interested in prebuilt aircraft, so I decided to design and build a trainer.
Twin Comanche Scratch BuildThe Twin Comanche has a 2 meter + wing span with 3 aluminium spars. 
|
I wanted an aircraft that was easy to fly and tough as nails because I knew I would, more than likely, drive it into the ground. Balsa and ply just wasn’t an option. I had already used aluminium spars on a scratch build twin Comanche (see www.twincomanche.info) and I had been formulating ideas for an all-aluminium aircraft. So I laid out the parameters for my design.
I decided to use aluminium where I could in the build (the fuselage, leading and trailing edges are all aluminium). Aluminium is easily to work with, replace if necessary and available at any decent hardware. I knew that the trade-off for this strength was going to be weight, a higher wing loading, but I am happy with the results. The Rhino meets all of the criteria.
 Rhino in a Suitcase___
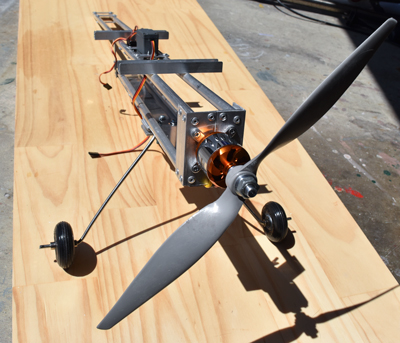
I wanted to keep the aircraft as basic as possible. The longest part of the aircraft would be the fuselage and a large suitcase could take about 80cm (31.5 inches) so that was my starting point. I decided this was the length of a 3.2 to 40 size aircraft and selected the electric running gear to suit. The fuselage was designed around a Turnigy 4000mAh 3S 30C lipo pack and a Turnigy D3542/5 1250KV brushless outrunner motor. This turned out to be a good combination although I’ll keep experimenting with others. (That’s part of the funJ).
Previously, when working with aluminium spars, I realised that, with the right configuration, I would be able to adjust the dihedral. This had a lot of influence on the design of the Rhino. The Rhino can be configured with 0° to 10° dihedral... from sports flier to stable trainer. This is simply done with spacers under the wing mounts.
The aero-foil was selected to compliment the aircraft's ability to transform with an almost symmetrical aero-foil, the lower section being slightly shallower than the upper, between aerobatic and training configurations.
I incorporated plenty of control surface on all controls for those who want to throw the aircraft around.
After her maiden flight I am confident that she will turn out to be everything I had hoped. Weather permitting we will be putting her though her paces in Darwin. I will post the results on this site and Facebook. As an old friend use to say, “I’m Excited!!”.
After the successful first flight of the Rhino prototype and with weather keeping us on the ground, a second Rhino is taking shape. We have incorporated only one minor design change. The fuselage is a few millimeters deeper to offer a little more room for the running gear and expand the engine mount plate to accept larger motors.
With a second Rhino in the air it will be hard to resist some formation flying and how are we going to resist a dog-fight.
 Apology
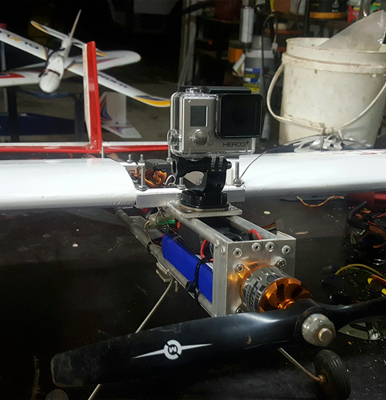
The first Rhino production aircraft has been fitted with a FTP camera. The video 'We're Going to Crash... Crash Testing the Rhino' was shot entirely using this system.
________